Thin Water Tunnel Hull design
Recently, I put up an informative article on two, economy Jonboats; Swamper and Swamp King: http://lunadadesign.net/swamper-and-swamp-king/ Those boats were drawn to address a very simple and practical approach to a thin water, all-purpose utility skiff and there has been a very nice response from readers seeking plans.
Taking the Jonboat concept further, I got an email from a boating enthusiast asking if I had ever designed a tunnel hull boat along the lines of the Swamper. He indicated that he had seen a boat something like that which had been designed for very thin water work. The boat in question was a full 20’ in length and he felt that the size would be just too much for one guy to either pole around or man- handle in any kind of windy situation. So, he was asking if I had one like that about 16’ long.
It turned out that I did not, but weirdly enough, I had been tossing an idea around very much like his request for some time. He was kind enough to direct me to the www.bateau.com website where I could take a look at the fine design work of Jacques Mertens and his XF20. http://bateau.com/proddetail.php?prod=XF20#.VdpaH_lViko
To be completely candid, I felt that the XF20 was quite a nice boat in every respect except that I had a customer who was asking about one for his needs, which needed to be 4 feet shorter. I had already designed a full-tilt, 18’ vee hulled flats machine for fast runs across open, choppy bays and thin water poling sessions called The Flatsmonster.
So, I took many of the ideas I had in the Flatsmonster design and the Swamper series and combined them with the really nice elements of the XF20 to create the Blackwater 16.
Because of this choice of bottom shapes, this boat will be a lot more fun if you try to take it across a choppy body of water at speed. The forward vee shape of the hull will allow for faster speeds in open water as it will help to cut through the waves rather than bounce over them. As a swamper’s poling machine, it will excel in the narrow backwaters and thin mangrove estuaries where some really prize fish hang out, well out of reach of conventional fishing boats.
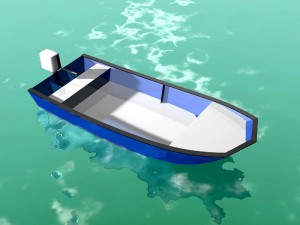
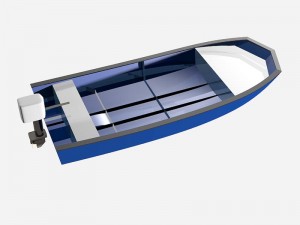
This is a pocket tunnel hulled boat with a wide stance that can support two fishermen and all their gear in very, very thin water. The hull has defined, 8 degree vee sections up front to help break some of the light chop one might find on backwater sessions in the late afternoon. The run aft from amidships is very nearly flat to allow the boat to plane easily with a very small outboard.
If you want to take this boat into the Bayou and hunt for a pig, you’ll find that the hull can carry a very sizeable load with ease. I can really see this design as perfect for a duck hunter. Just rig a short mast in the center of the hull and hang a camo net over the gunnels and you have room to spare underneath for your cooler, your gun selection and the battery powered TV with earphones.
I’m not going to go into the technical description of the pocket tunnel, as there is a wonderful paragraph on the functional aspects on the Bateau site. Needless to say, the tunnel allows the engine to be raised up higher than normal giving additional clearance in the water for the prop to run in shallow water.
This means you can go further into the creeks in your boat while using the engine. That translates to being able to stay out longer and come home later because of the additional speed over a poled boat in really shallow water. I figure nearly four additional inches of water depth before you’ll have to shut it down and paddle compared to a conventional Jonboat.
I suggest that you don’t exceed 30 hp for an outboard on this boat so that you can maximize the potential of the thin water capability. It’ll run surprisingly good with a 10-20-hp engine and in thin water and tight quarters, a lot of power would just go to waste, anyway. There’s a tendency to install too big an outboard on most recreational boats. I’m hoping that most folks recognize that a lighter, more efficient engine is actually better all around for 90% of all the boating work you will need to do.
Construction of the boat is in stitch and glue style with 3/8” hull bottom panels, deck, seat and fishing surfaces and ¼” plywood everywhere else save the transom. There is a lightweight framework truss in the hull beneath the deck to give the boat longitudinal strength. The suggested bench seats and forward fishing platform also serve as flotation chambers to keep the boat afloat in case it is swamped. The builders of this boat have the potential to build the interior out anyway they would like beyond the supplied bench seat design, but the more they add, the heavier the boat gets and that starts to take away the thin water capability of the design.
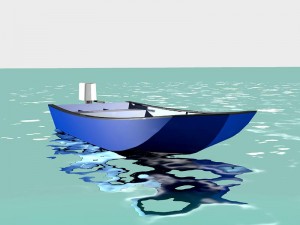
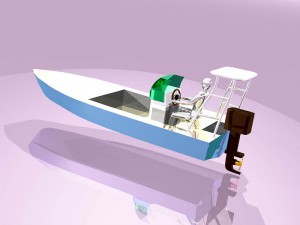
As shown in the illustrations, there is a midships frame and a continuous surface deck. Under the deck are two, full length stringers. These additions provide for a near bullet-proof hull with an added benefit. If the hull skin were to be holed from an unseen underwater obstacle, the flooding would be confined to the area of the damage as the compartments under the deck are sealed from one another to provide flotation integrity. Yes, the boat is a little heavier, but the payoff is in the enhanced safety, and hull rigidity if you decide to take it up to faster planing speeds.
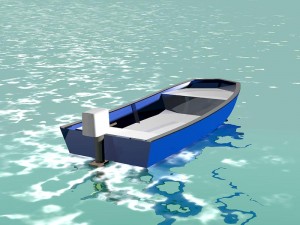 This is an easy boat to build and it will provide hundreds of hours of enjoyment for the owner, especially after he customizes the interior to suit his favorite applications and fits-out the boat with all the trick goodies for his recreational passion.I suggest that the boat be built with epoxy taped seams inside at all joints with a full layer of epoxy glass on the outside of the hull. Prudent builders will add a layer (or two) of extra glass at all the sharper, hard corners to protect them from the inevitable banging a boat of this type will receive during use.
Plans will be available in the next month from Duckworks and will run USD$75. They include full-sized paper templates and detailed instructions regarding any of the stuff that is not straight forward, simple. There is also a suggested layout map for nesting the panels efficiently. The templates allow you to simply scarf together the ends of the full sheets of plywood, layout the templates, trace a line around the edges and start cutting the hull panels. No lofting required and quite a bit of time saved plotting points and bending sticks.
Chris Ostlind
Lunada Design
Chris@Wedgesail.com
